Run an LLM Locally to Interact with Your Documents (Step‑by‑Step Guide)
Imagine using ChatGPT… but fully offline, private, and connected to your own documents.
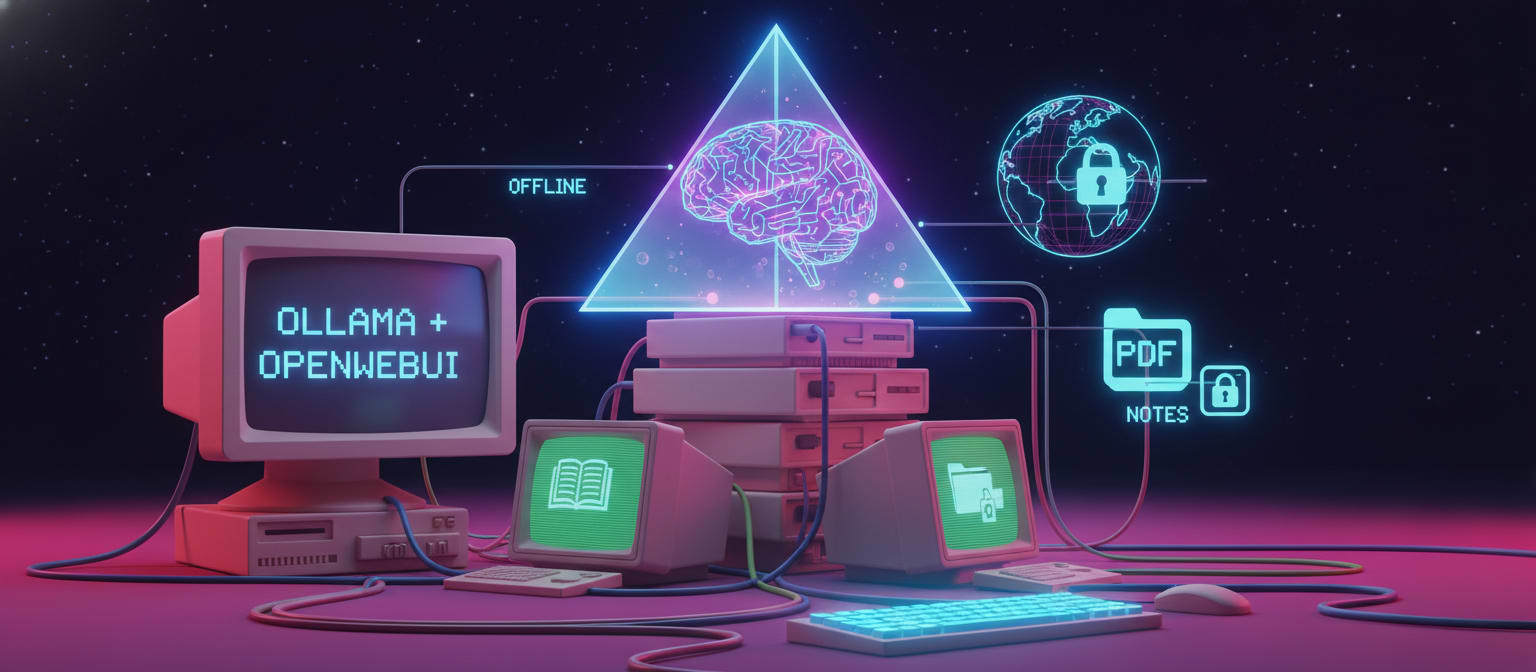
In this guide, you’ll set up a complete local AI stack using Ollama + OpenWebUI, and make it capable of answering questions from your PDFs, notes, or knowledge base.
No cloud. No API costs. Your data stays on your machine.
What You’ll Build
- A local LLM running on your laptop
- A ChatGPT‑like web interface
- AI that can search and answer using your own documents
- Optional memory + custom behavior using system prompts
Prerequisites
You’ll need:
- A terminal (Windows / macOS / Linux)
- Either:
- Python 3.9+ and pip, or
- Docker
- At least 8 GB RAM (16 GB recommended)
The Stack
We’ll use three main components:
- Ollama – runs AI models locally
- OpenWebUI – browser interface (like ChatGPT)
- nomic-embed-text – embedding model for document search
Step 1 – Install Ollama
Download and install Ollama from its official website for your OS.
After installing, verify it works:
ollama list
If it runs without error, you’re good to go.
Step 2 – Install OpenWebUI
Install using pip:
pip install open-webui
Start the server:
open-webui serve
Open your browser:
http://localhost:8080
You should see the OpenWebUI interface.
Step 3 – Download an AI Model
Choose and download a model using Ollama.
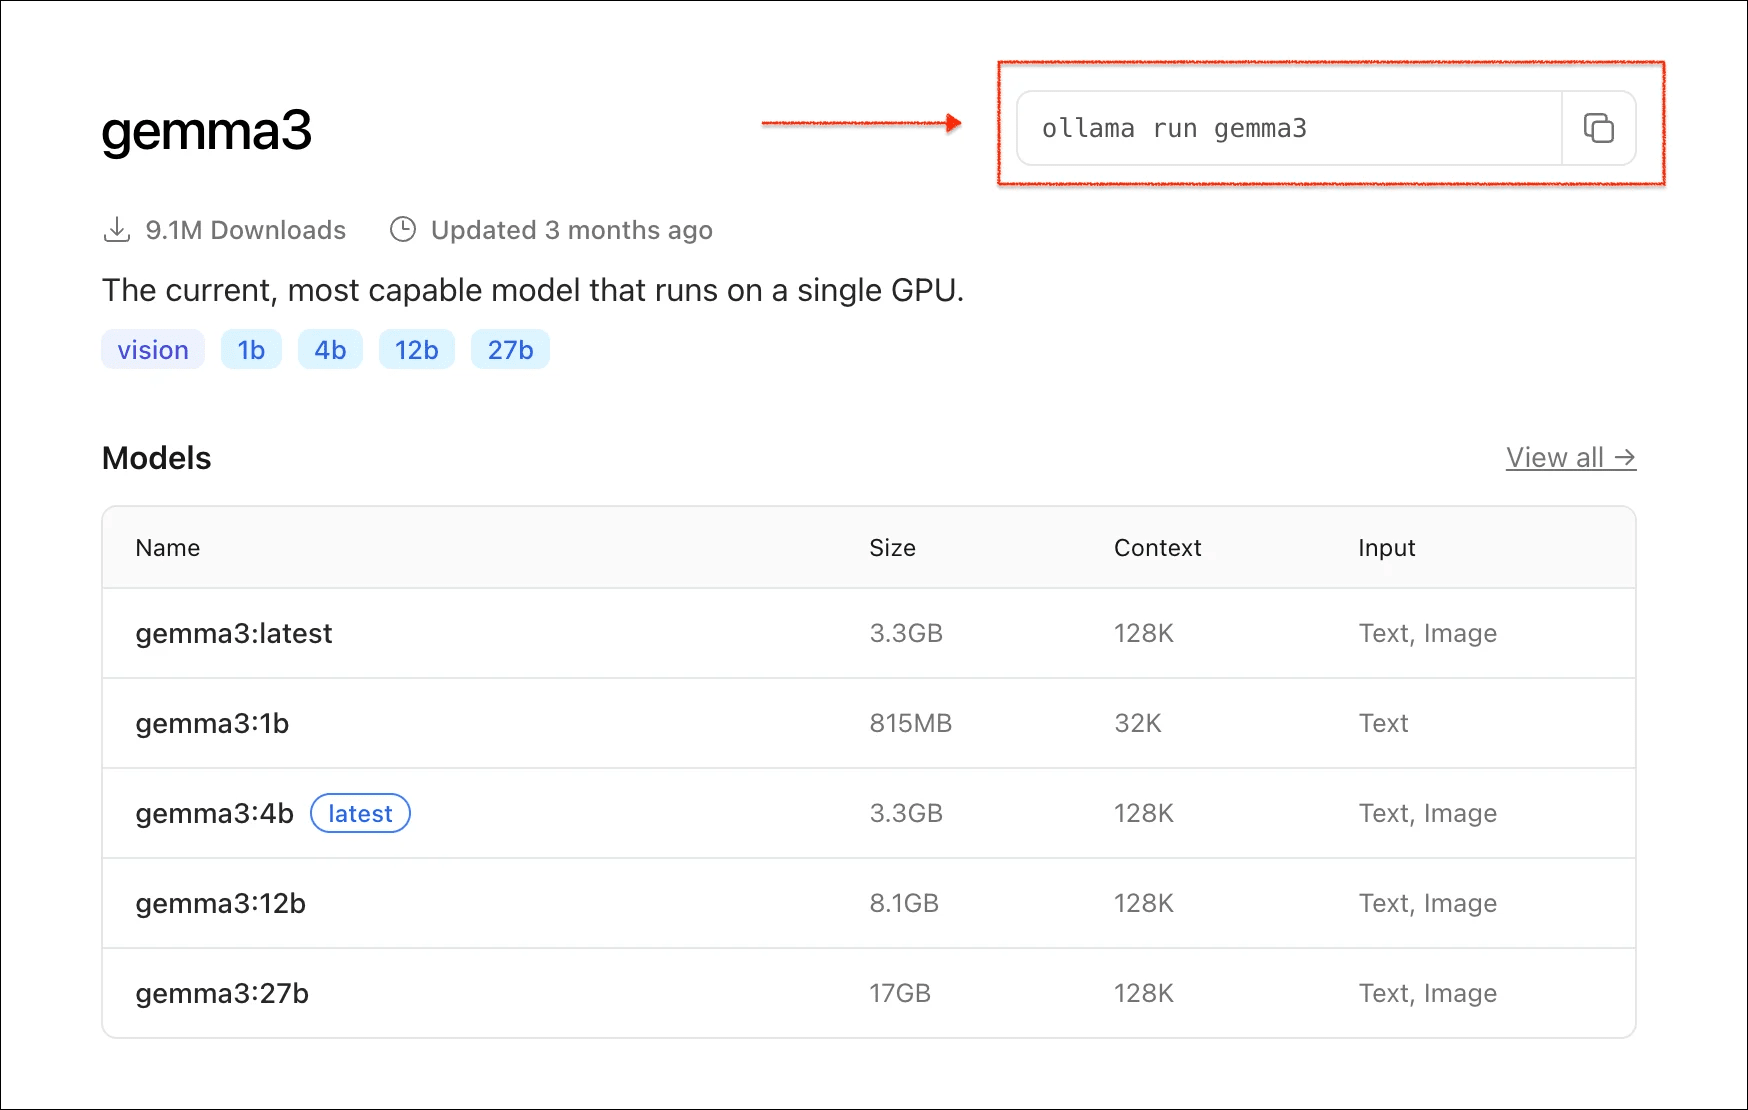
Example (recommended starter):
ollama pull gemma3:4b
You can download multiple models and switch anytime.
Verify installed models:
ollama list
Step 4 – Enable Document Support
Install the embedding model:
ollama pull nomic-embed-text
Why this is needed
- Embedding model → converts document text into vectors
- Chat model → generates answers using retrieved chunks
Both work together for document‑based Q&A.
Step 5 – Enable Memory + Document Settings
In OpenWebUI:
- Click your name (bottom‑left)
- Go to Settings → Personalization
- Enable Memory
Then:
- Open Admin Panel → Settings → Documents
- Set:
- Embedding Engine → Ollama
- Embedding Model →
nomic-embed-text - Enable Full Context Mode
Step 6 – Configure Chunking (Important)
Documents are split into chunks before indexing.
Recommended values
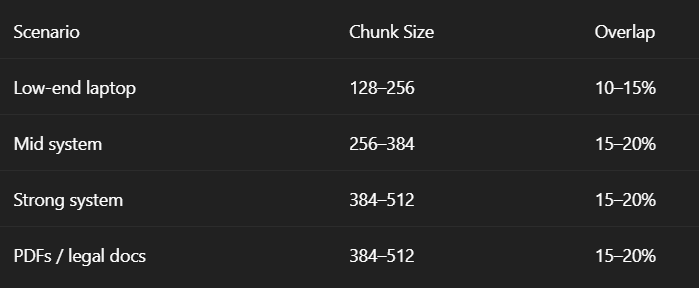
Changing this later requires re‑uploading documents.
Step 7 – Upload Your Documents
Go to: Workspace → Knowledge → New Collection
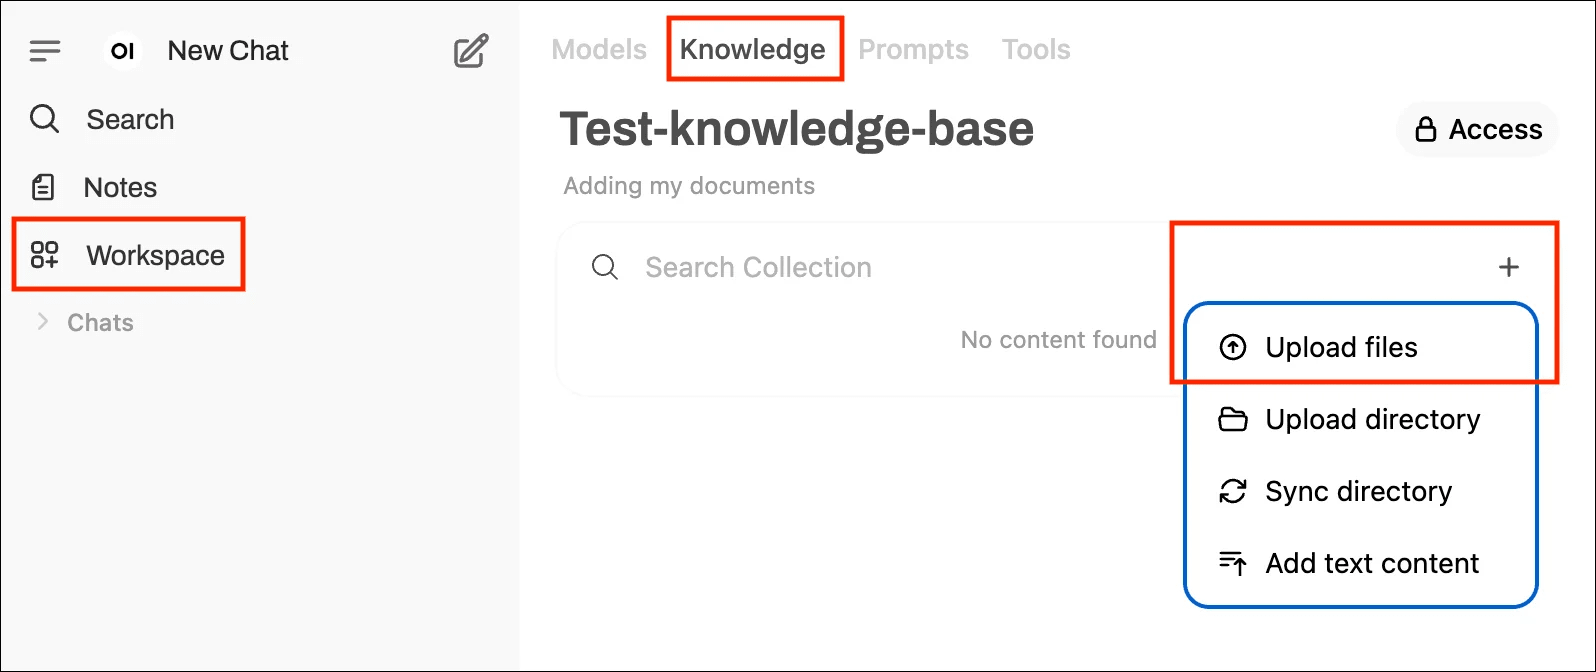
Upload your files:
- PDFs
- Notes
- Text files
- Documentation
Watch for upload errors (they appear briefly).
Step 8 – Create a Custom Model
Go to:
Workspace → Models → Create New
Set:
- Base model → your downloaded model (e.g., gemma3:4b)
- Knowledge → select your document collection
Save the model.
Step 9 – (Optional) Add a System Prompt
You can control how the AI behaves.
Example:
You are a thoughtful, analytical assistant helping me explore patterns and insights in my personal journals. Be direct, avoid speculation, and clearly distinguish between facts from the documents and interpretation.
This will apply to all chats using your custom model.
Step 10 – Start Chatting
Create a new chat and select your custom model.
You can now ask questions like:
- “Summarize my notes”
- “Search my PDFs for X”
- “Explain this document section”
All processed locally.
Final Result
You now have:
- A private AI assistant
- Running locally
- Connected to your own documents
- With memory + custom behavior
- Zero API cost
From here, experiment with:
- Different models
- Better chunk sizes
- Custom system prompts
- Plugins and extensions
Conclusion
Running your own LLM locally gives you full control, privacy, and flexibility. Whether for learning, research, journaling, or business documents, this setup turns your laptop into a powerful personal AI system.
If you build on this, iterate slowly: improve models, tune chunking, and customize prompts based on your workflow.
Explore our blog for more practical learning, developer tools, and project ideas.
Happy building 🚀